Friday, February 14, 2014

Keep Calm and Drink a Beer

Since I like homemade gifts for Valentine's day, I thought I would make one for my husband.  It's the golden rule right? Do unto others?  So, crafty things for guys doesn't always turn out that awesome or well received, however that I made is awesome and was well received.  I can't really put into words what I made him, so here's the picture:
  I, of course, found the idea on Pinterest.  It was a super simple and relatively inexpensive thing to make.  I got a 11x14 inch shadow box from on clearance at Michael's for $10, cut a slot in the top big enough for the bottle caps to go in, and put on the vinyl quote I cut out using my Silhouette Cameo. This can also easily be done without a machine by using stickers. (In full disclosure....I accidentally put the vinyl on upside down so the slot is on the bottom of the frame now, but eh, it still looks cool and it functions.)
If you aren't as frugal as I am, they do sell shadow box frame at Michael's for $40 that have a sliding top just for the purpose of dropping things into the top. The display picture is of wine corks.
So to tie the gift together, I bought my husband some beer. I went to Hy-Vee and the Wine and Spirits manager could pick up at my blank stare at the wall of beer that I needed assistance.  He happily helped me pick some beer that "have the same taste pallet as Spotted Cow", which is one of my husband's favorite beers.  I don't know if I should take it as a compliment or not that the manager then didn't card me.... 
After my craft efforts and the subtle hints of the Valentine's advent calendar I made for my husband (discussed in a previous post), I was pretty positive I was going to get something nice on Valentine's day.  Yeah....you what they say about assuming...you make an ass out of u and me.  That's what I did. My husband didn't even have a card for me.  He did make me an omelet for breakfast and put a candy bar in my car when he started my car to warm it up for me. (The warming up the car thing is a daily thing per our agreement that allows his beloved sports car take up my spot in the garage.)  So I know I really shouldn't complain because I won't allow him to spend much money, but really? He couldn't even take a crayon like he did last year and scribble out a card?  I thought for sure when I got home from work in the evening that there would be a little surprise for me, or at least a hand written note since I had given him 14 plus nice handmade valentine's card.
Yeah... I need to keep calm and have a beer.  Probably shouldn't take one of the special ones that I bought him, though, huh?

Monday, February 10, 2014

May the Force Be With You

My oldest son loves Ningago, star wars, and the color green.  He wanted to tie all of these in to his Valentine's card.  He and I browsed Pinterest for ideas since the store didn't have any that really popped out at him.  We settled on a photo card with a glow bracelet inserted in it to look like a lightsaber.   After some editing on PicMonkey, this is what our cards ended up looking like:
 Can you tell that he's a ninja Jedi?  K, cause I really can't either, but he says that that's what he is and I'm happy that he's super excited out his Valentine's cards.  Sam's Club photo made these super cheap in the wallet size (you order one print and it's actually two that you cut apart yourself.)  The glow bracelets came from the Dollar Tree. I bought a pack of 15 for $1.

Wednesday, February 5, 2014

And now I know why there is adhesive card stock!

I saw a really cool grandparent's printable on Pinterest that someone was selling on Etsy, so I thought I would try my hand at something similar.  This is the pin that I saw from JackandJillyDesigns on Etsy:

My mother in-law has four grandkids and I think that there are no more coming, so I thought this would be a cute thing to try.  I found a quote on a similar designed stating "My greatest blessings call me Grandma."  I know my mother in-law laments never finding anything with "Grammie" on it, so personalizing this is something she would really appreciate. I used my Silhouette Cameo to design and cut out something like this and use the middle square as a picture frame.  I wanted to add more pops of color so I added scraps of paper behind the cut out area.  I thought this would be pretty simple, however, finding the fonts that worked well together and the sizes and all that was a little harder than I thought.  Then, I stupidly cut it out on card stock. I had to hand glue all the little insides of the letters.  Wow, I learned something on that one: Adhesive card stock is worth it!  Also, maybe a printable isn't so bad!  It would probably have looked nicer since on the really thing cursive font, it kind of gummed up the paper, particularly on the "s" and "g".
This is my product, with out the picture in it or having it in a frame yet, but you get the idea.

Tuesday, February 4, 2014

Subtle Daily Valentine's Reminder For Husbands

So Valentine's Day is coming up pretty quickly.   Since I have a mom that loves the after holiday sales, I have a lot of holiday hand towels and gel window stickers so BOOM...I'm now decorated for Valentine's day!
My husband really isn't a holiday kind of guy, particularly not Valentine's day. That's fine by me most of the time, because his idea of gifts is different than mine.  I LOVE heartfelt things. He prefers to purchase items.  Don't get me wrong, the year I got my Nikon DSLR I was all for commercialism! I've used that camera AT LEAST a few times a week for 3 years now.  My favorite gift from him, however, was a heart he welded out of muffler piping and wire coat hangers.  He made it for me our first official Valentine's day together 8 years ago.  This is a picture of us using it as a photo prop when my oldest son was 2 weeks old.

I haven't gotten anything handmade since...Okay, I take that back.  He made me this card last year:

Anyway...I saw this idea on pinterest  from the Silhouette America Blog for a Valentine's Day Advent Calendar.

I loved that idea!  I changed it a little.  I didn't include numbers and I titled mine "I love you because..."  Here is mine:

I got the frame for $1.99 at a thrift store and used cross-stitching floss for the "wire."  Michaels sells a set of mini clothes pins in variety of colors for $19.99. (I know I will do more with all the other colors of the clothes pins.)  You can also get a small package of white clothes pins there as well.  Then I used scrap book paper to make the envelopes and cards.  I didn't use the cutting machine like the original person did on the Silhouette blog. Mine was all by hand.
My husband really loves it and I hope this will serve as a reminder that Valentine's Day is coming and handmade simple things can mean a lot!  We'll find out in a week and a half!


Sunday, February 2, 2014

The Hands of Time Keep Moving

I'm just going to throw it out there...I don't like sports.  I was invited to a Super Bowl party with my husband, but politely declined as I didn't think having a toddler around a bunch of grown men yelling at a TV would be fun for anyone involved.  My husband went with my older son and I was left with said toddler.  I was not broken hearted in the least! We had a lot of fun and made a HUGE mess.  You see, he LOVES to paint.  (Fortunately, the paint we have is washable.  I don't even pre-treat the clothes or anything!!)  So we painted :)  As I'm slowing decorating my office, I realized I needed a clock.  I got one at Walmart for less than $4 with the intention of taking it apart to just use the hands and make a custom collage clock.  Well, that plan quickly changed as I got sappy with my little guy and how big his handprints are getting.  I decided to frame his handprint in the clock.  I was surprised how easy this whole task was.

Supplies:
-Clock (Mine is a Walmart Mainstays $4 clock)
-Philips Screw Driver
-Artwork or picture
-Scissors

Instructions:
Step One:  Take the clock apart.
My clock had 5 screws on the back that separated the front frame from the back.  Just unscrew them and take it apart.  You'll then want to pull the hands off the clock.  They may bend, but that's okay, you can bend them back.

Step Two: Customize your Clock
I took the frame and traced the circle around a handprint so I would know where to cut.  I then put the handprint on the clock and pushed the clock hand holder thingy (yeah, so technical) through the paper.  You can then use the scissors to may a nice smooth opening.  You'll want it fairly big because if it's too snug around the protruding thing, the hands won't move.  The hands will cover up a lot, so don't worry about having the hole too big.

Step Three: Put the Clock Back Together
Snap the hands back into the clock and straighten them out if they got bent.  Test them by turning the time knob on the back of the clock.  If they all move, that's great!  If they don't, either cut more paper around the "thingy", snap in the hands farther, or you put the hands together in the wrong order.
Put the glass and frame back on and screw in the screws and you are done!

Thursday, January 30, 2014

Holy Motivation!

Well, I have been pretty motivated tonight!  It's like I'm bordering on mania!  After supper I made two meals to be used as left overs out of things I needed to use up in the fridge before the expiration date (I thought bulk cottage cheese from Sam's Club was a good idea...opps!)
So I made creamy carrot soup from this pin from Pioneer Woman.  I cheated and didn't use raw carrots, but I did use up 4 cans of carrots that my mother in-law gave me that a friend had given her.  I was able to make the soup in minutes by putting it all in the blender!  It was great!
pioneer woman's picture...mine went straight to tupperware.

I also made manicotti.  I made up the recipe after reading a few others.  I put a bunch of cottage cheese in the blender and added spices and a little spaghetti sauce and put it in the in the cooked manicotti noodles then placed that in the over for 10 minutes and ta-da! (picture from before it was cooked.)

My greatest feat was that I did the taxes.  We finally got my husbands W-2 today.  I think I got it all entered correctly and we don't have to pay in this year!! YAY!

Wednesday, January 29, 2014

Chocolate is the answer!

I started a new job this month.  I have a rather large office all to myself.  It's really quite nice, but being that I haven't really had an office to my own or at least one that I got to decorate to my choosing, I have very few decorations or personal touches.  My mission tonight was to change that.
The job I have is somewhat stressful, and what's the best thing to handle stress?? CHOCOLATE!  So, I saw a cute little image on pinterest.  It said "Chocolate is the answer. Who cares what the question is."  I thought it would be perfect for a little jar of chocolate candies on my desk.  I went out and got a nice little glass jar at a consignment shop for $1.99 and went to my computer to create something my Silhouette Cameo could cut out and slap onto the jar.  (I got a little extra motivation since I discovered the weekly challenge on the silhouette blog and I thought I would go for it!) 
Creating it wasn't an issue at all, but I overshot how big my jar was. It's a small 3.5 inch square space that I had to work with.  That means the Silhouette had to cut VERY small letters.  It didn't have much issue with that at all, it's just that I'm a cheapskate and I used black contact paper. (I want to save my vinyl for when I'm confident with using my machine.  This is only the third project that I have used it for.)  Transferring contact paper can prove to be difficult as it's not as sticky as vinyl.  I lost a letter the first time I did it, then two the second time.  Black paper on a black desk top with black clothes on makes for finding little pieces of black contact paper nearly impossible!! As I was about to give up and just eat the chocolate that was going to put in the jar, I decided that it really didn't need to be perfect so I mixed and matched letters and skipped the embellishment all together since that was WAY to intricate and kept ripping on me.  I think it ended up nice despite my struggles and the uneven lettering.  My favorite font in this project was Birmingham, which is what I used for the word "Chocolate."  I also used Arial Bold.  I can't remember what other ones I used, but they were standard ones that my computer already had on file as well.

Friday, January 24, 2014

How am I measuring up?

I finally completed a nice little thing I pinned a long time ago.  It’s a ruler growth chart.  I made it out of a board we had in the garage left over from the house remodel we did next door, some stain I borrowed from my parents, and some black contact paper. (Yes, I have a ton of that stuff!!) I cut the numbers and lines out with scissors and the words I used my Sillouette cutting machine.  I love that it has our family name on it.  It's just a nice personal touch :) I think it turned out awesome!  Now to hang it up and start measuring people!

Sunday, January 19, 2014

Who needs exercise anyway?

So, the exercise portion of the new years goal is really losing motivation.  It’s really difficult to do any sort of “formal” excise with my kids around. My husband and I decided to sign up for the YMCA because between both of our work’s discounts and rebates, it’s only about $30 a month for the entire family. How could we say no? They even have free daycare!Well, that’s great an all, but by the time I get home from work, and get things settled, it’s supper time, and then it’s calm down time, and then it’s bed time for the kids.  There is no way I’m going to be dragging them out and wiring them up right before bed all on my own. (Yay to being a wife of a second shifter...)  Then there is the option of me going to exercise before work.  Not really an option since who is going to watch, feed, and dress the kids?  My husband says he would get up and do it, but saying and doing are two different things.  Since the Y is near where I work, I could go over there on my lunch hour, which I may do eventually, but right now I’m still getting used to this new job and I haven’t been able to schedule it in.  So… for now, my husband is getting fit!  He’s going after he drops off the kids at where they need to be he works his butt off. He’s signed himself up for a triathlon that my sister and brother in-law do every Spring.  I jokingly asked him if I should sign up for it too, since everyone else is doing.  He looked at me and laughed.  I guess that’s a no.  I have it half in mind to sign up for it and show him who’s who, but yeah…he laughed because I would die and I really would.

In other areas of my new years resolutions, I’m doing great!  We are saving a lot of money by not going shopping as often and me not commuting as far to work anymore.  The house is much more organized.  

Here are a few things that I have done to keep it organized:
Under Sink tension rod to hang up my cleaning products.  I really don't use any cleaning products in I use Norwex (It's an all natural cleaner that kills germs with just a cloth and water!! It's amazing!)  I just can't get myself to part with cleaning products because that would be so wasteful.  Last year my boss was moving and was getting rid of his cleaning products and I took his so they wouldn't go in the landfill.   Sigh....so anyway, here is my collection.


I also got some help from my husband to make a electronics drawer.  We just drilled a hole in the back of the drawer for a power strip cord could go through it and the power strip just sits the in drawer and we can plug in all of our electronics and they aren't hanging out all over the place.  It's also perfect to keep the battery chargers at for the cameras there too!


Now in terms of having more fun with kids, I have been making a lot of snacks WITH them, rather than FOR them.  We made two different kinds of puppy chow (of muddy buddies as some people call them.)  One was the regular kind, the other was snickerdoodle cookie flavored.  I followed a pin on pinterest to The Recipe Critic to find that recipe. It was awesome and my husband loved it!  His favorite cookies are snicker doodle cookies.

The kids and I also attempted to make an igloo.  The idea was fun, but like me resolutions, the follow through wasn’t totally there.  My older son really wanted to build one, but he was the contractor, and I was the worker.  The younger son thought he should be the inspector and basically said none of the work was good enough and would knock it down and make me start over.  That left me and the contractor kind of frustrated.  After 2 hours and no real progress, we called it a day and went inside for some hot chocolate.

Sunday, January 12, 2014

*Singing* We are Family!

I have seen this picture pop up on Pinterest a few times.

It's a beautiful tree from an Etsy shop called NouWall.  
It is so pretty and it's such a cool way to display all those old family pictures and I want one!
I was not interested in spending the money to order one when surely I could figure out a way to make one.  Well, I figured out a way!  The great thing about this way is that it's not paint and it's not vinyl so it's not permanent, if you don't want it to be.  You can do this in an apartment and not fear that it's going to rip of some paint like vinyl can sometimes do. (For the record, NouWall states that their vinyl is removable, however suggest that you test it in an area first.)
My Tree: Ta-Ta!


Here are the supplies I used for my tree:
-black contact paper (bought mine on amazon)
-printer paper
-printer
-scissors
-tape
-image of a tree
-credit card
-picture frames
-pictures
-patience


Step one: Find an image you like.  
I just went to the sites that were selling the tree decals and found the image that I liked from their catalog and downloaded the image.  Silhouette type images work the best for this type of job.  It doesn't matter if it has watermarks and such on it because you are just using it as a template. This is the image that I used from NouWall:

Step Two: Go to Bigblockposters.com and upload your image and create a poster.
Bigblockposter.com is a free website that enlarges your pictures so you can download and print them on your own.  The idea behind a "block poster" is that you have a poster made up of many "blocks" or in this case, sheets of paper. You simply upload your image and then say what demensions you want it to be blown up to.  The dimensions are based on paper size you are using.  I had mine set to landscape and went as large as they could go, 10 sheets by 9 sheets of standard size printer paper. Your image will then be available for download in the PDF format.  
Just a heads up, your image will probably be very pixelated since it was blown up so much.  It really doesn't matter for our purposes because you just need a rough idea of what the tree looks like so you aren't going to be creating one completely from scratch.  If you are making a poster that you want to hang up and enjoy, you would need to find a high quality picture with a large pixel amount.

Step 3: Print out the block poster.
This would seem to be a simple task, but let me give you a few tips:
                -Regular printer paper is fine.  I used cardstock and you really don't need to, I thought the added weight would be helpful, but it really wouldn't matter. It's cheaper to use regular paper.
                -The paper couldn't all fit in my printer at one time, so I made sure that I was sitting by it to refill it as it was getting low so that the printing process wouldn't stop and get messed up.
               - Number the papers as they are getting printed off.  I used a letter and number system for columns and rows.
               - The image will not be printed to the edge of the page, so there will be some margins

Set 4: Lay out the Papers.
You will need a large space for this. I moved some furniture to be able to do this.  You can also just do it in a few rows at a time, but I wanted to get an idea of what it looked like.


Step 5: Weed out blank papers. 
There are going to be a lot of blank pages!

Step 6: Tape the papers together in strips.
Since contact paper comes in a roll, you'll want to tape the pages together in strips that would fit on the contact paper so you can cut it out.  Since there are margins on the papers, it's really easy to overlap and tape.  You will want to cut off one side of the margin so you don't have a white stripe though. What I did was tape the trunk together, then I taped two rows at a time together of the tree branches.  **Mark on the branches somewhere what row it is because after cutting out all the rows, it will get a little confusing what row it is since the number/letter assignment has been cut off.**

Step 7: Tape row a of paper to the contact paper and start cutting!
This is a long and tedious task.  My husband helped me out on one small section and gave up on it.  The next day we celebrated my 31st birthday and he surprised me with a Silhouette Cameo cutting machine that's been on my Pinterest wish list for a long time.  He had it over-nighted from Amazon because he finally understood how much hard work I have been putting in on cutting out wall quotes with an x-acto knife. 
Just remember that you don't have to follow exactly what the template says. This is YOUR tree.  No one will know what you made a mistake.  Contact paper is not vinyl, you can reposition it and cut it after it's up on the wall too!
** You may want to mark on the back of the contact paper what row and where the brank was located (second from the left, ect) since paper tends to fall off unless you retape it on.**

Step 8: Tape up the contact paper to the wall.
This is the part that's like a puzzle. The trunk is the best part to start at.  Place it where you want it and tape it to the wall.  Don't tear off the paper and stick the contact paper to the wall just yet.  You want to get a feel of how big and where the tree will go.  There will be adjustments that you have to make before putting it on the wall for real.  This is the part where all the labeling and separated piles come in handy.  It's also a good idea to have a small image of your tree available so you can envision it as you are putting the pieces together.  I know for a fact that my tree isn't put together correctly, but I really don't care.  I like how it looks and no one else knows that it's not what it was originally going to look like. (Okay, so all of you know since it's supposed to look just like the image I found on Pinterest, but SHHH!)

Step 9:  Step back and make some tweaks.
I had to move mine a few inches to the right.  I also didn't like how some of the branches looked, so I thinned them out and eliminated a lot of leaves. (Okay, so I eliminated a lot of leaves as I was cutting in general because they were super tedious to cut out!)

Step Ten: Peal off the backing of the contact paper and hang it to the wall!
Like when taping it up, I would recommend starting at the bottom.  Another tip is to not completely press the contact paper to the wall just yet.  You may want to move it just a little and it's easier if it's not completely stuck on the wall yet.  The branches WILL get tangled up and stuck together.  Just breath and know that with some slow movements and patience it will all become untangled. My contact paper was able to be pulled apart after getting stuck together and it was no big deal.  Frustrating, but no big deal.  Once you get it all how you like it, take the credit card and run it over the contact paper and get all the air bubbles out and flatten the contact paper to the wall.

Step 11: Hang up picture frames
I had a lot of picture frames laying around because I always wanted a photo wall and have been hoarding frames for years.  After some thinking, I decided I would go with the black frame look, rather than the random colors of frames.  I did splurge on a $10 set of 10 black frames from Michael's because I wanted shapes other than the normal rectangles.  The set I got had two ovals, a circle and a square, along with the boring rectangles.

Step 12: Enjoy!!

Sunday, January 5, 2014

They say a Messy Office a Fertile Ground for Creative Mind?


What a fun and productive weekend!  Since my husband had early over time (am I the only on that thinks that phrase is weird?) I was alone with the boys all weekend.  This let me check off a few things on my Pinterest list!  My husband generally rolls his eyes at ideas that I have culled from Pinterest, so it was nice to have some freedom.
Since I had some crescent dough that I had to use up and it was a super cold day, I thought it would be a perfect day to have crescent roll s'mores.  The boys did a great job of helping me break apart the rock hard marshmellows that I hadn't stored very well from the last bon fire we had.  The end result was a super yummy dessert!  Eating them warm is the very best.  I tried a left over one without nuking it and it had an overpowering taste of butter crescent roll.  I stuck the half eating roll in the microwave and zapped it and it was much better.


Following the baking, came craft time.  My boys love to color and paint.  I made them an art bucket!  
All it is is a 5 gallon bucket and a tool caddy from a store like Lowes, Menards, or Home Depot.  I got mine at Menards.  It has all their art supplies, coloring books and stickers all in one spot! I found the idea on Pinterest. I want to give someone credit, but the link was broken to the site it came from. My closest guess from the broken address and the sites it lead me to is that this lady made it. http://mykotori.blogspot.com 


After the boys went to bed, I was able to tackle some paperwork.  There was a study that said that a "messy office is ground for a creative mind."  Well, I like to think of myself as creative, but a cluttered house is a cluttered mind to me.  After getting my new to me computer for Christmas, I decided I wanted to move my "office" downstairs to the spare room, or as my oldest calls it, Grammie's room.  This would allow me to work on the computer at night and not be in fear of waking up the sleeping monsters as neither the "office" or the boys' room have doors on them.  (We have an old house that has a strange set up.  There really is no way to put a door onto the office as it's more of an alcove, and the boys room...well, we don't feel like spending the money for a custom sized door just yet.  A black out curtain on a shower curtain rod does a fine job for now.)  


Anyway, I am a bit of a hoarder when it comes to paper, so this transition gave me a great opportunity to get things straightened out. On Pinterest I found a neat list of what papers to keep and pitch from the University of Illinois.  Wow, that just cleared out a TON of space!  For some reason, I thought you had to keep pay stubs for years.  Well, turns out, after you get your W-2 and all is accurate for taxes, you can get rid of those.  Sweet!  That alone cleared out a file drawer!  I am embarrassed to say that I also kept old utility bills....even to a house that has been bulldozed following a massive flood years ago.  So, needless to say, I much less overwhelmed with my filing cabinets. 

Before
After


By the way, I need to show off my awesome filing cabinet that I made over a while back.  It was a filing cabinet that I got at Goodwill for $5 that was a yucky mustardy color.  I lived with it for a few years, then Pinterest came around and I saw an awesome file cabinet makeover idea.  So, I went to the Dollar Tree and got a roll of contact paper for...you guessed it...$1 and I went to Walmart and got a 97cent can of white spray paint and went to town!  So, this is my $7 filing cabinet/side table and I love it!

Saturday, January 4, 2014

What's the best way to eat an elephant? One bit at a time!

The elephant that I want to eat is to have my WHOLE house organized.  Yup, I'm going to eat this elephant!  I discovered this gem on Pinterest:

In line with a few other new year's resolutions (I haven't used the stove yet), this challenge hasn't started yet.  They start the first FULL week of January.  I guess that means I have some time to back out before starting.  Then it would be like college, I wouldn't really fail, I just dropped the challenge.

The first week starts simple:  declutter kitchen counter and sink area.  I have got this down about one day every two weeks!  I can make that happen next week, score!

Since that was an easy enough challenge that I don't dare start too early because then I'll have to do it twice, I took a peek at what week two has in store.  It's the kitchen drawers and cabinets.  Hmmm...I have a lot of those. I need get a jump start on that pronto!  So, last night on the first date night my husband and I have had for 6 months, we bought some new food storage containers.

Don't feel too bad, we also had some fun trying out the Photo Booth functions on my new to me computer from Santa.  See?

Okay, so yeah, we may not do what most people would do on a date night, but like my mom reminds me:  I'm not most people!

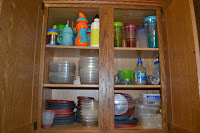
Anyway, we bought new food containers because ours are about 6 years old and have seen better days.  They are stained and some have chew marks from the dogs because we didn't keep the container far enough away from them when we had our backs turned.  We also needed to straighten out the cabinet.  So, my task for this morning between the times the kids got home and my husband had to leave for work, was to clean out the cabinet.
Here are the before and afters:

Not much different, you say?  Well, the problem really was all the old Cool Whip, sour cream, and cottage cheese containers that I was keeping out of sight as the cabinet has hidden storage.  I decided that while it was a cute idea that I would cook all the time and need extra containers for storage, they were never going to be used and are just taking up space.

I did, however, save all the old stained and chewed up containers and my older son and I had fun sorting out his legos by color.

Ta-da!

Good-bye, Mr. Lego-head-that-I-made-out-of-an-Utz-cheese-ball-jar-as-seen-on-Pinterest.  Your lid broke with-in three days and allows legos to be dumped by a messy toddler two seconds after being filled.

Wednesday, January 1, 2014

The other B word: Budget

So one of the major things that my husband and I need to work on is our budget.  Last year we bought the fixer-upper acreage next door and found out that we are not made out to be house flippers.  The house looks AMAZING, but also way over budget.  We are crossing our fingers it sells quickly.
Before
After

(We don't have cable, but I can assume all the house flipping shows really emphasize a budget...yeah, maybe we should have cable.)


Anyway, back to talking about a budget: today I found a little gem on Pinterest that I think will help us out with our budget.  While I have heard of Mint.com and their free budgeting information and tools that are linked up to your bank account, I didn't know they had an app for your phone. I have actually used Mint.com a few years ago to keep tabs on our budget. It was more effective than I my husband liked.  He went out and bought a video game without talking about it and I get an email from Mint stating we are over budget in entertainment.  Long story short, he tried to deny the purchase when confronted and soon after switched banks and didn't give me his new account information.  Yes...we have separate accounts.  I am a miser and hate spending money, and he spends his money on all the cool things he wants.  Our marriage couldn't handle a joint account.  It's difficult enough to handle a budget that we can both agree upon!  
I digress... there is a phone app that you can pull up and it will review the budgets that you have set up and let you know how much money you have in the grocery budget or entertainment budget or what have you.  My husband can now know if I'm going to be sent an email or not if he buys something, so it can keep him in check and encourage open communication about his purchases.  You should check out Mint.com and their app for you phone.

Let the Exercising Begin!

At 3:15am, my youngest son walked into my bedroom calling my name. It was a first for me.  My older son (4 years old) has yet to realize that he has the ability to get out of bed on his own accord.  Don't ask me why he's that way.  We didn't tell him he couldn't get out of bed on his own, we just never really said that he could.  I thought maybe I would be lucky enough for kid number two to get the same message since they share the same bedroom and since moving him to a toddler bed last week, he hadn't gotten out of bed on his own either.  I knew it was too good to be true, but I count my blessings that transitioning him to a toddler bed was no big deal!
Anyway, after attempting to sleep with him in our bed, he and I gave up at 5:30am and went downstairs so he could watch garbage trucks on YouTube and I could start my New Year's Resolutions.  Well, I did it!  I exercised!  I set up the desktop in the guest room this week and there is actually enough room to do some exercising.  I found a 5 minute ab workout on YouTube through Pinterest.


It's actually quite good.  My toddler son made it a little extra challenging by sitting on me. I felt so energized, I thought I would try another 5 minute video (Like my son, my attention span is short.)  I tried the 5 minute inner thigh workout.  Wow, I didn't know there were that many thigh muscles.  I may actually do these exercises again tomorrow (but don't hold your breath!)